近期想学习 stm32 开发,看了些书和视频,买了开发板。开发板到了后就迫不及待的的进行尝试。由于我目前使用的电脑是 Apple M1 Pro,目前用的比较多的是 windows + keil。我先是在 mac 使用虚拟机,安装 win 环境来使用,但是我分别使用了 VMware 和 parallels desktop ,keil 的使用是没问题了,但是 stlink 就一直驱动不成功,折腾了好久,还是不行,最后还是放弃了。就转移寻找直接在mac上进行开发的方式了。
在网上搜索各种方法、看了各种视频之后,采用了下面的方式,终于是可以直接在 mac 上进行开发了。
一、所需软件
- vscode
- STM32CubeMX
二、vscode 安装
这里就不具体阐述安装方式了,直接在官网下载安装即可。这里重点要说明的是 vscode 的几个插件扩展
核心扩展是 PlatformIo ,具体用法后面再说。
三、STM32CubeMX 安装
STM32CubeMX 下载:
https://www.st.com/zh/development-tools/stm32cubemx.html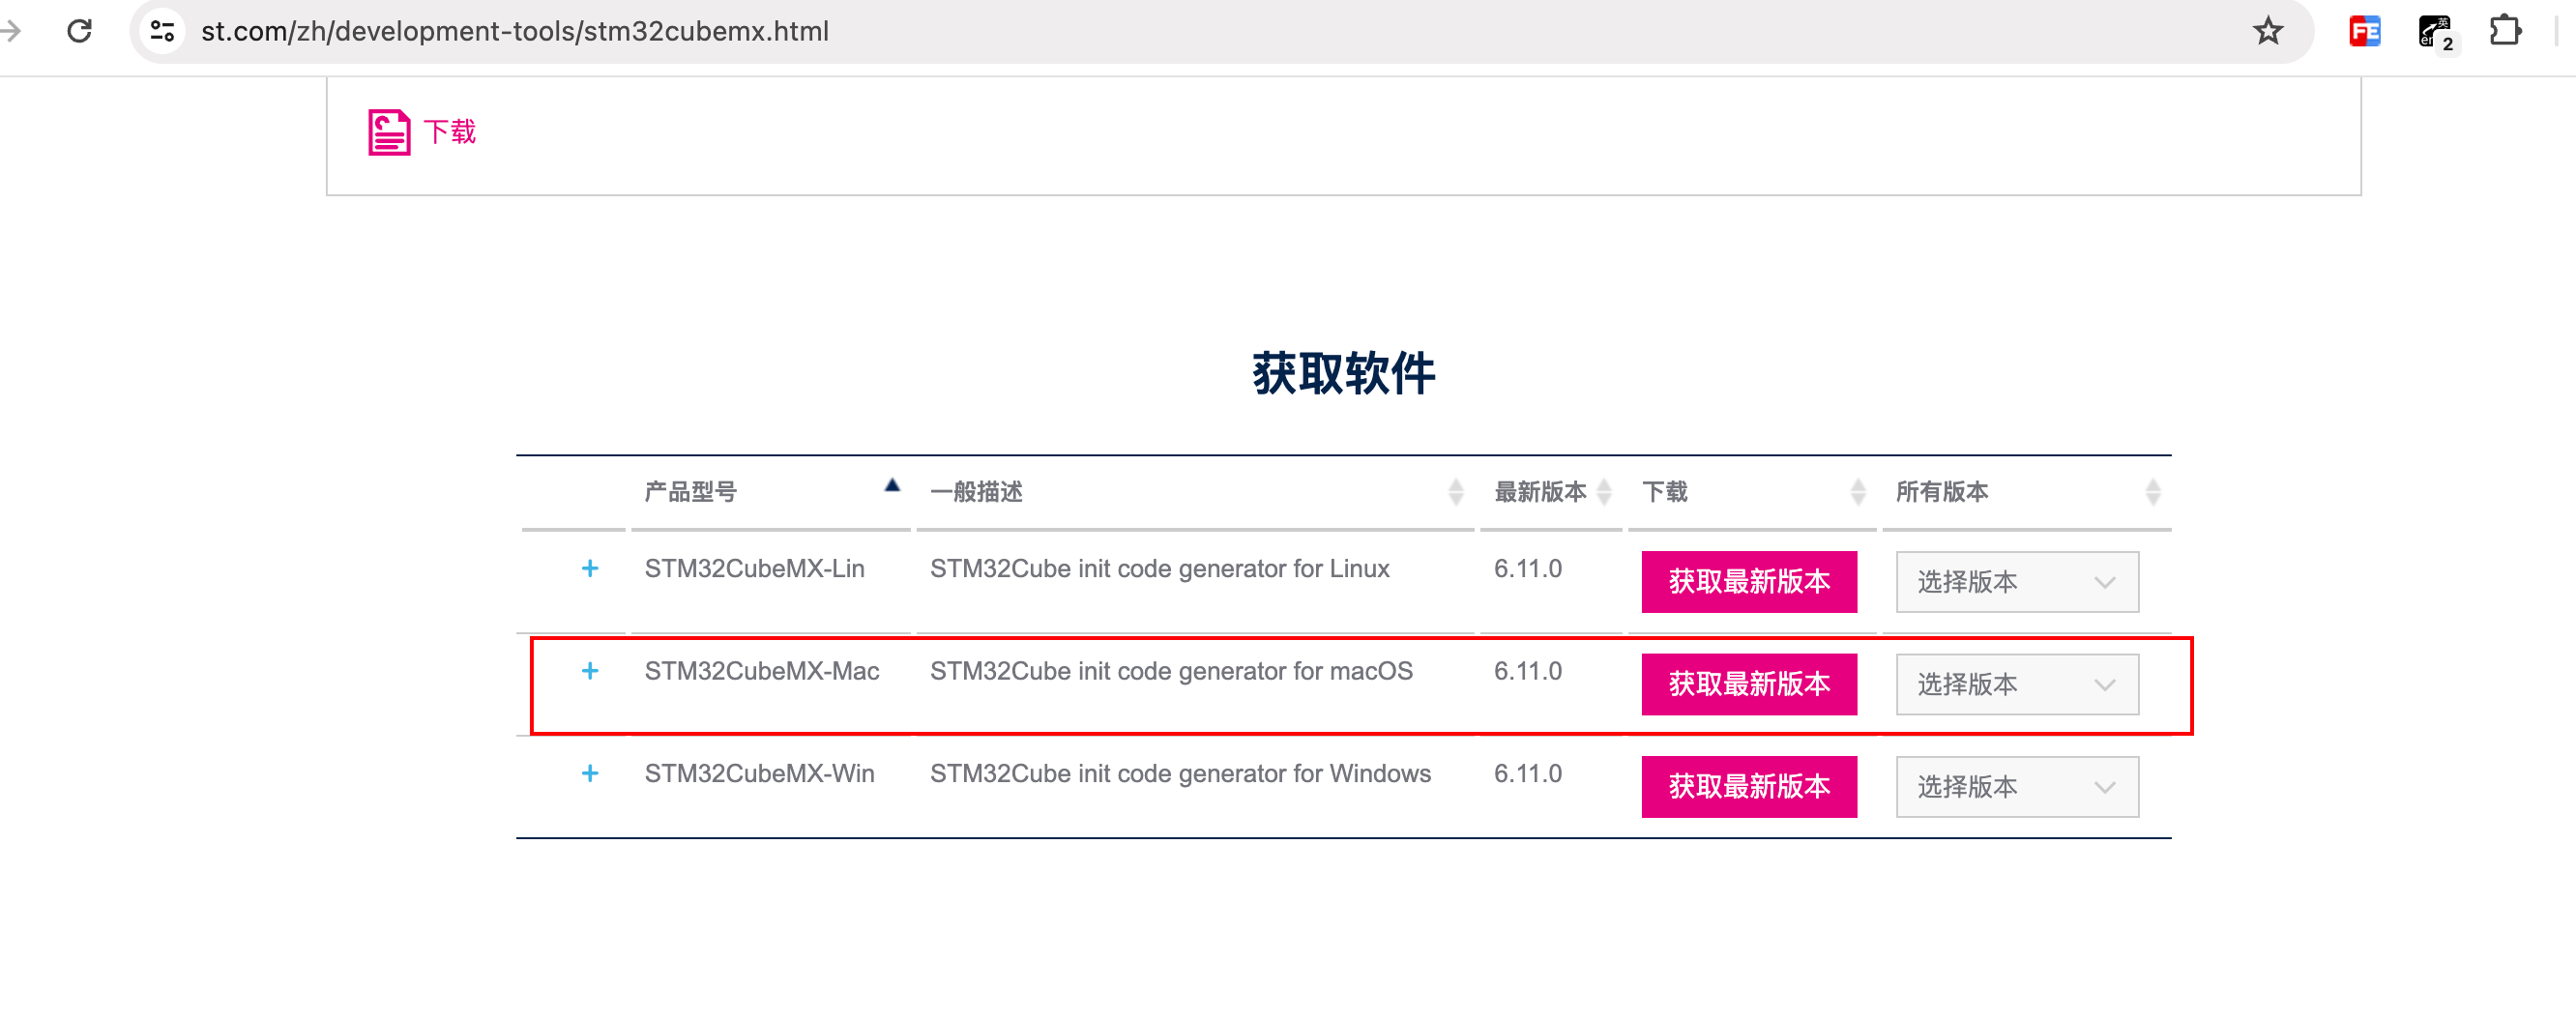
安装方式目前就使用默认的
四、开发
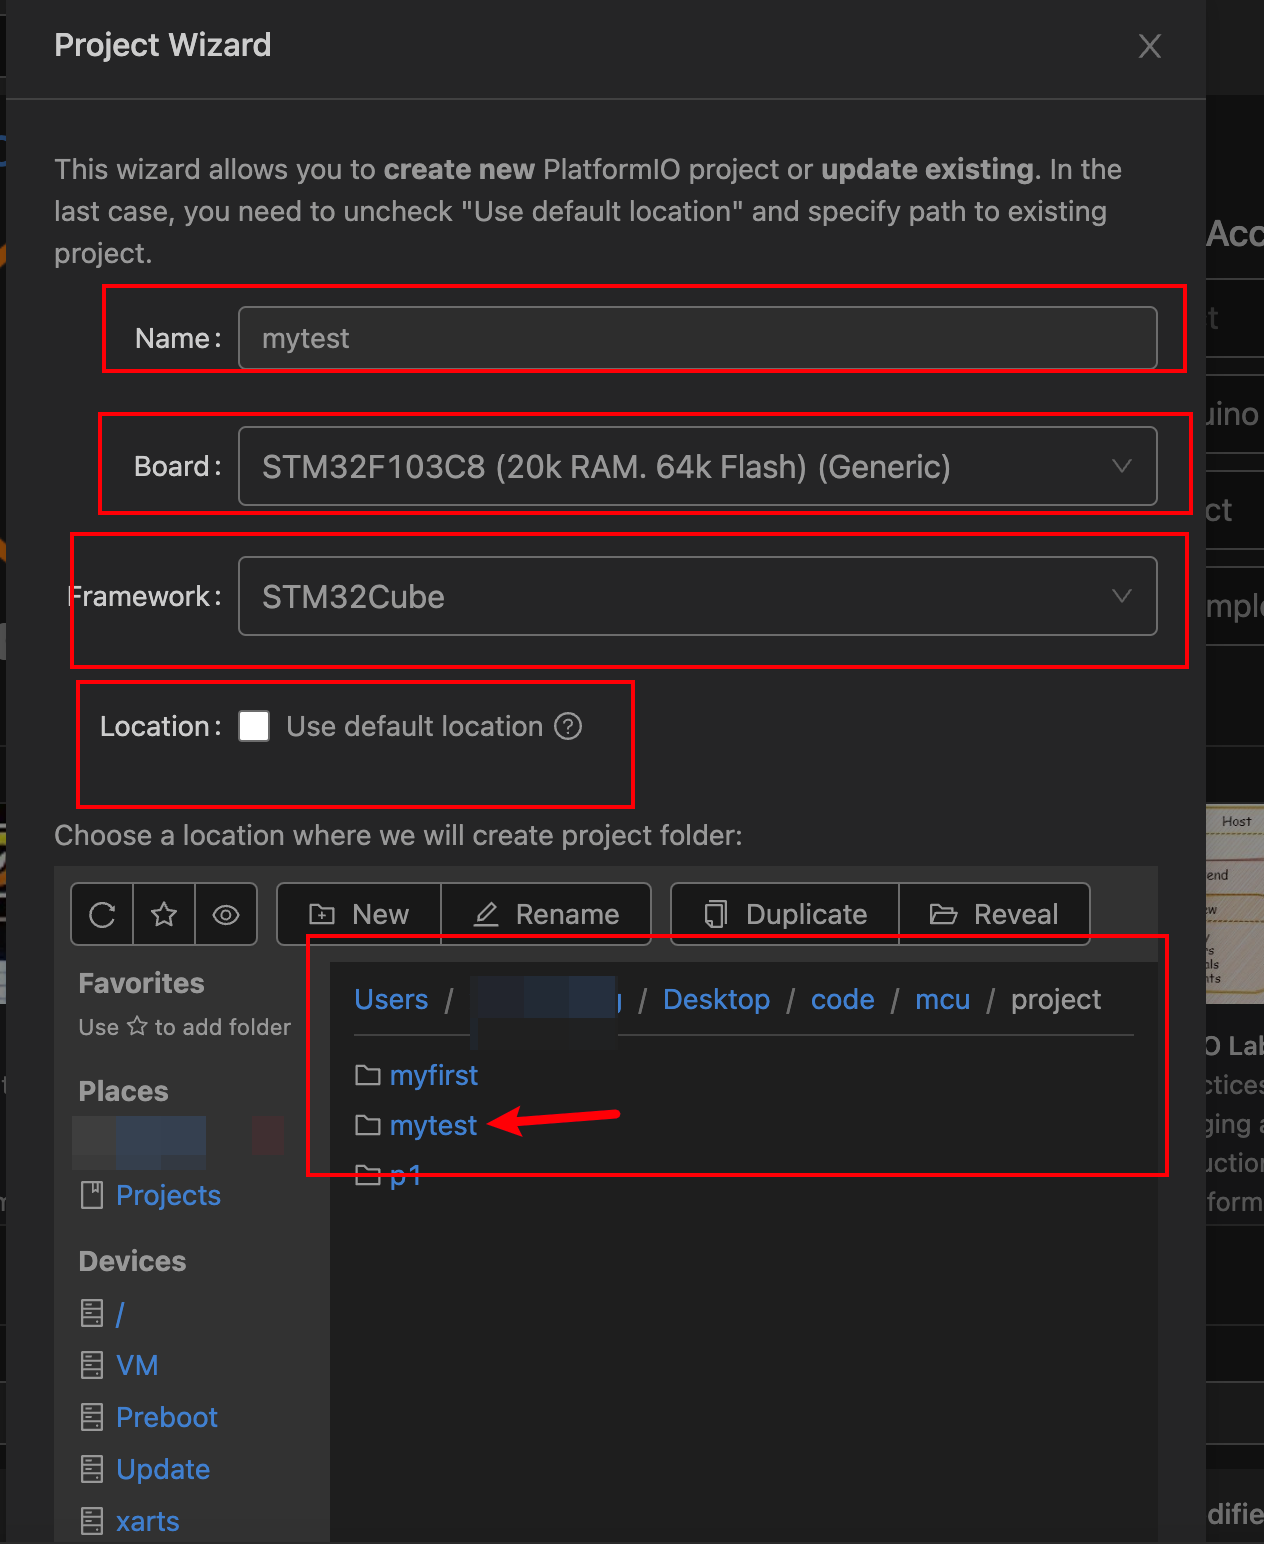
打开 STM32CubeMX 新建工程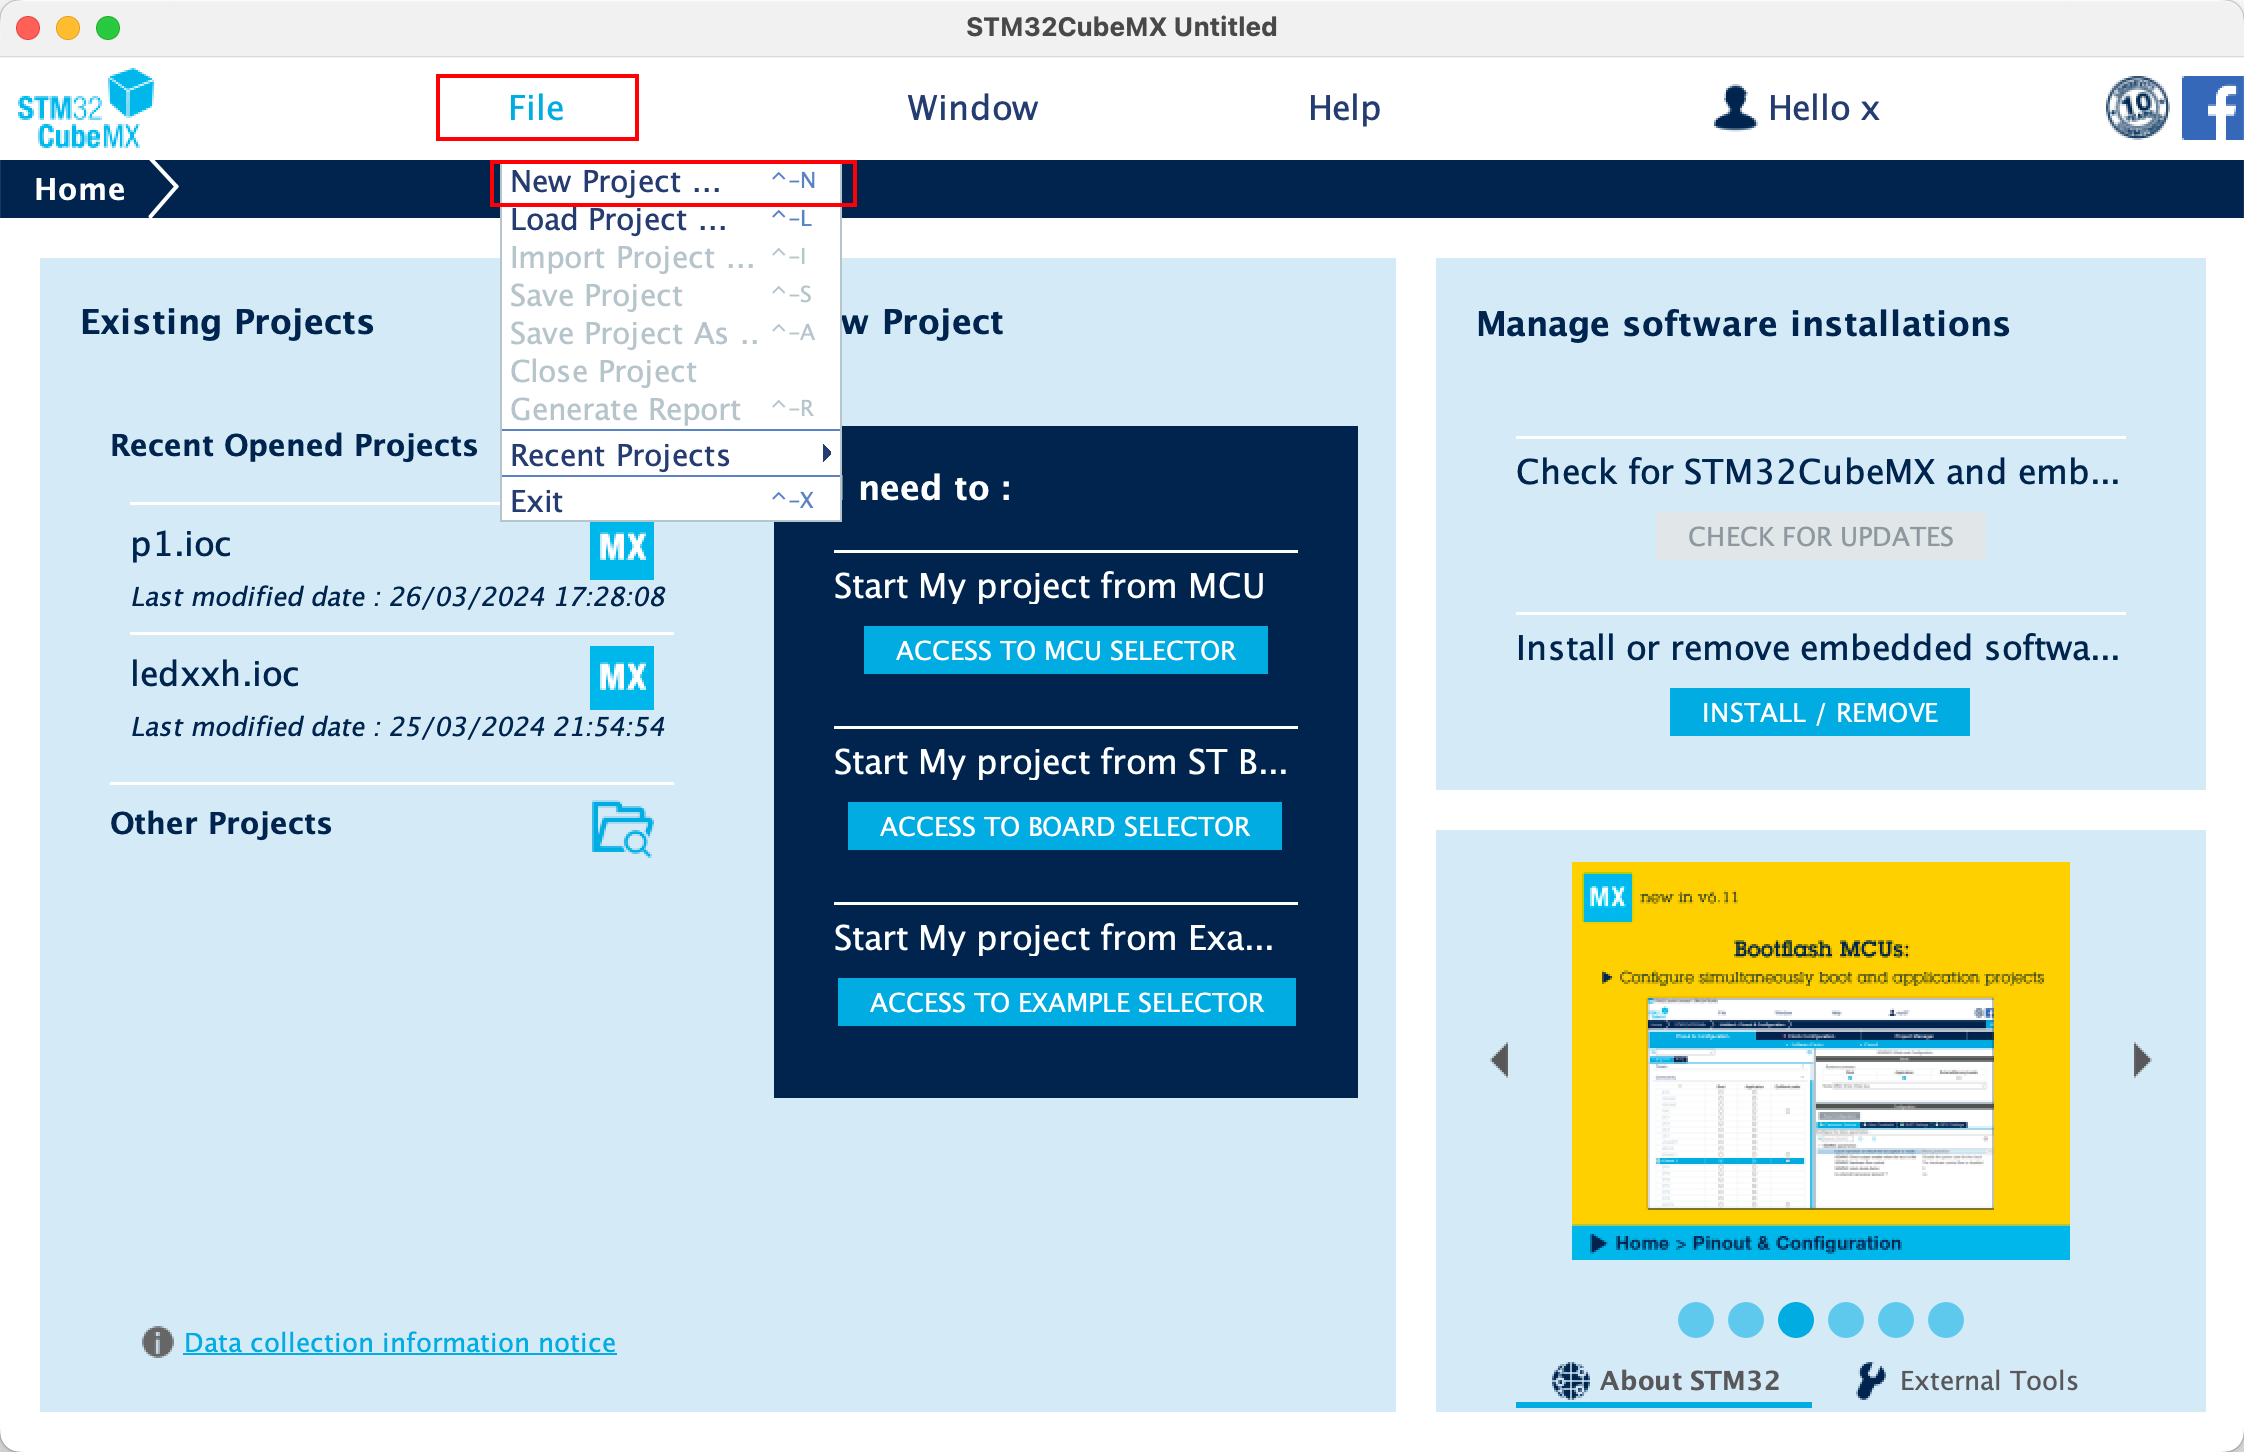
选择自己型号的 stm32 芯片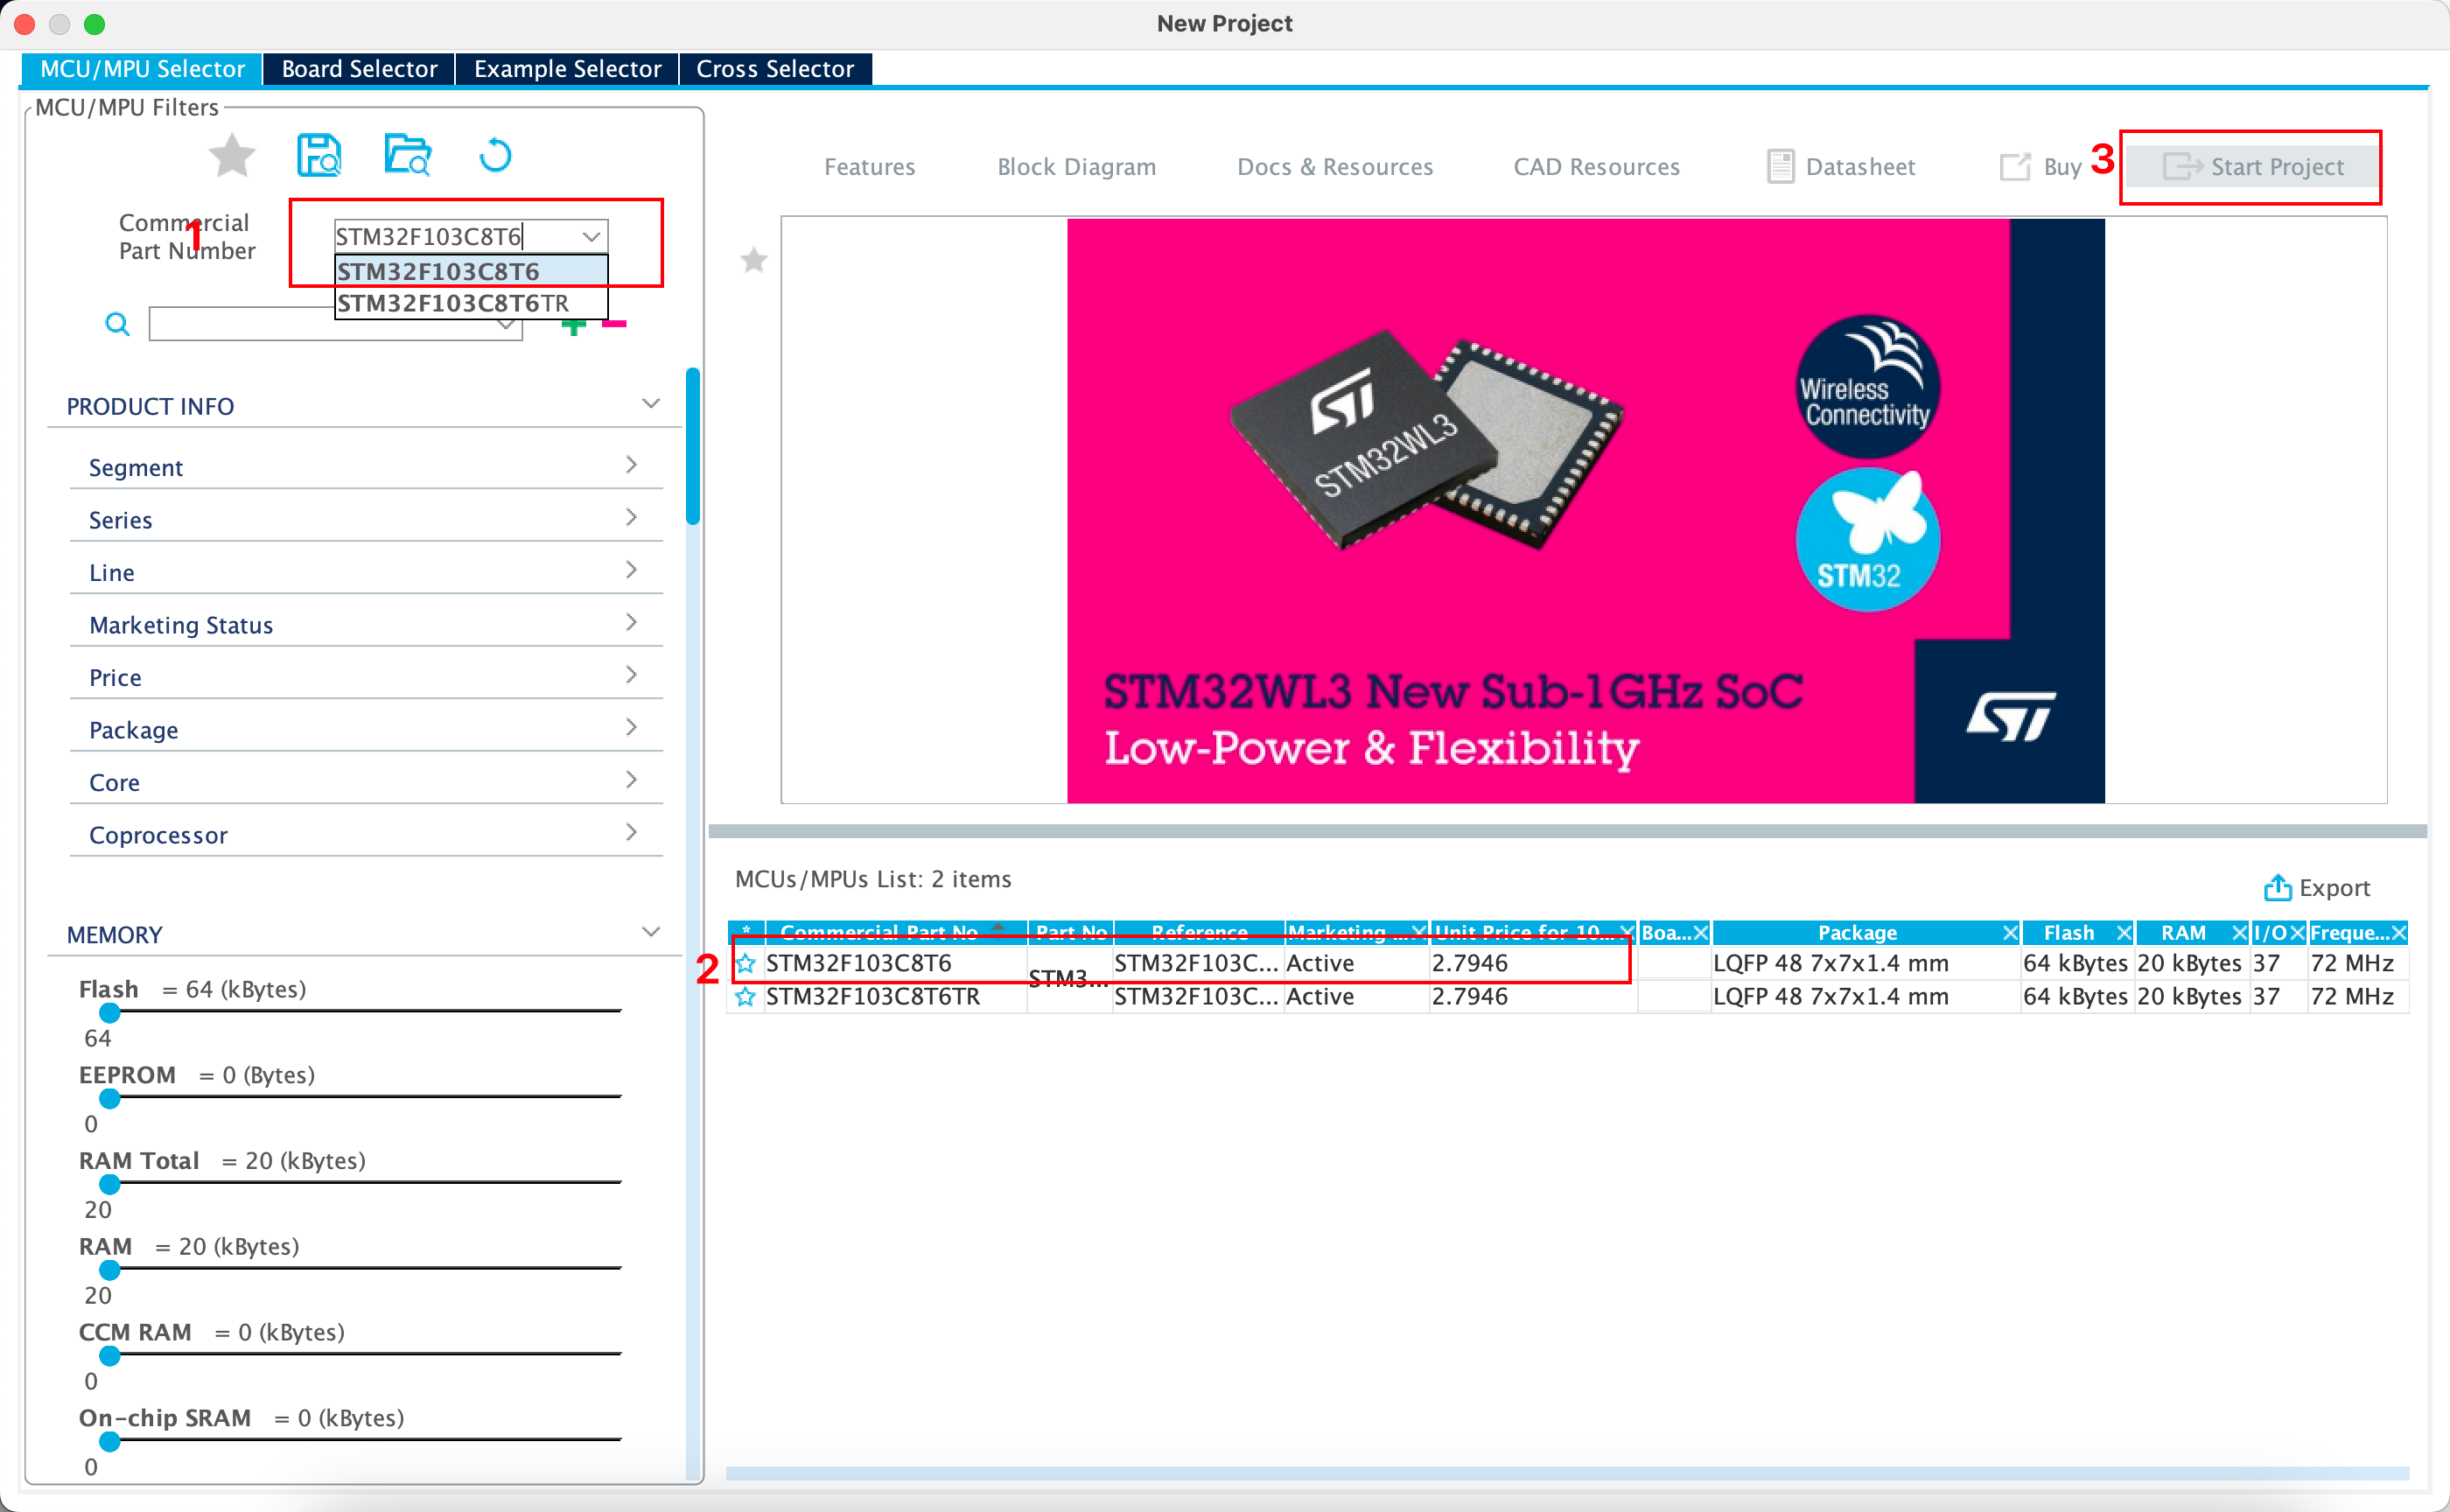
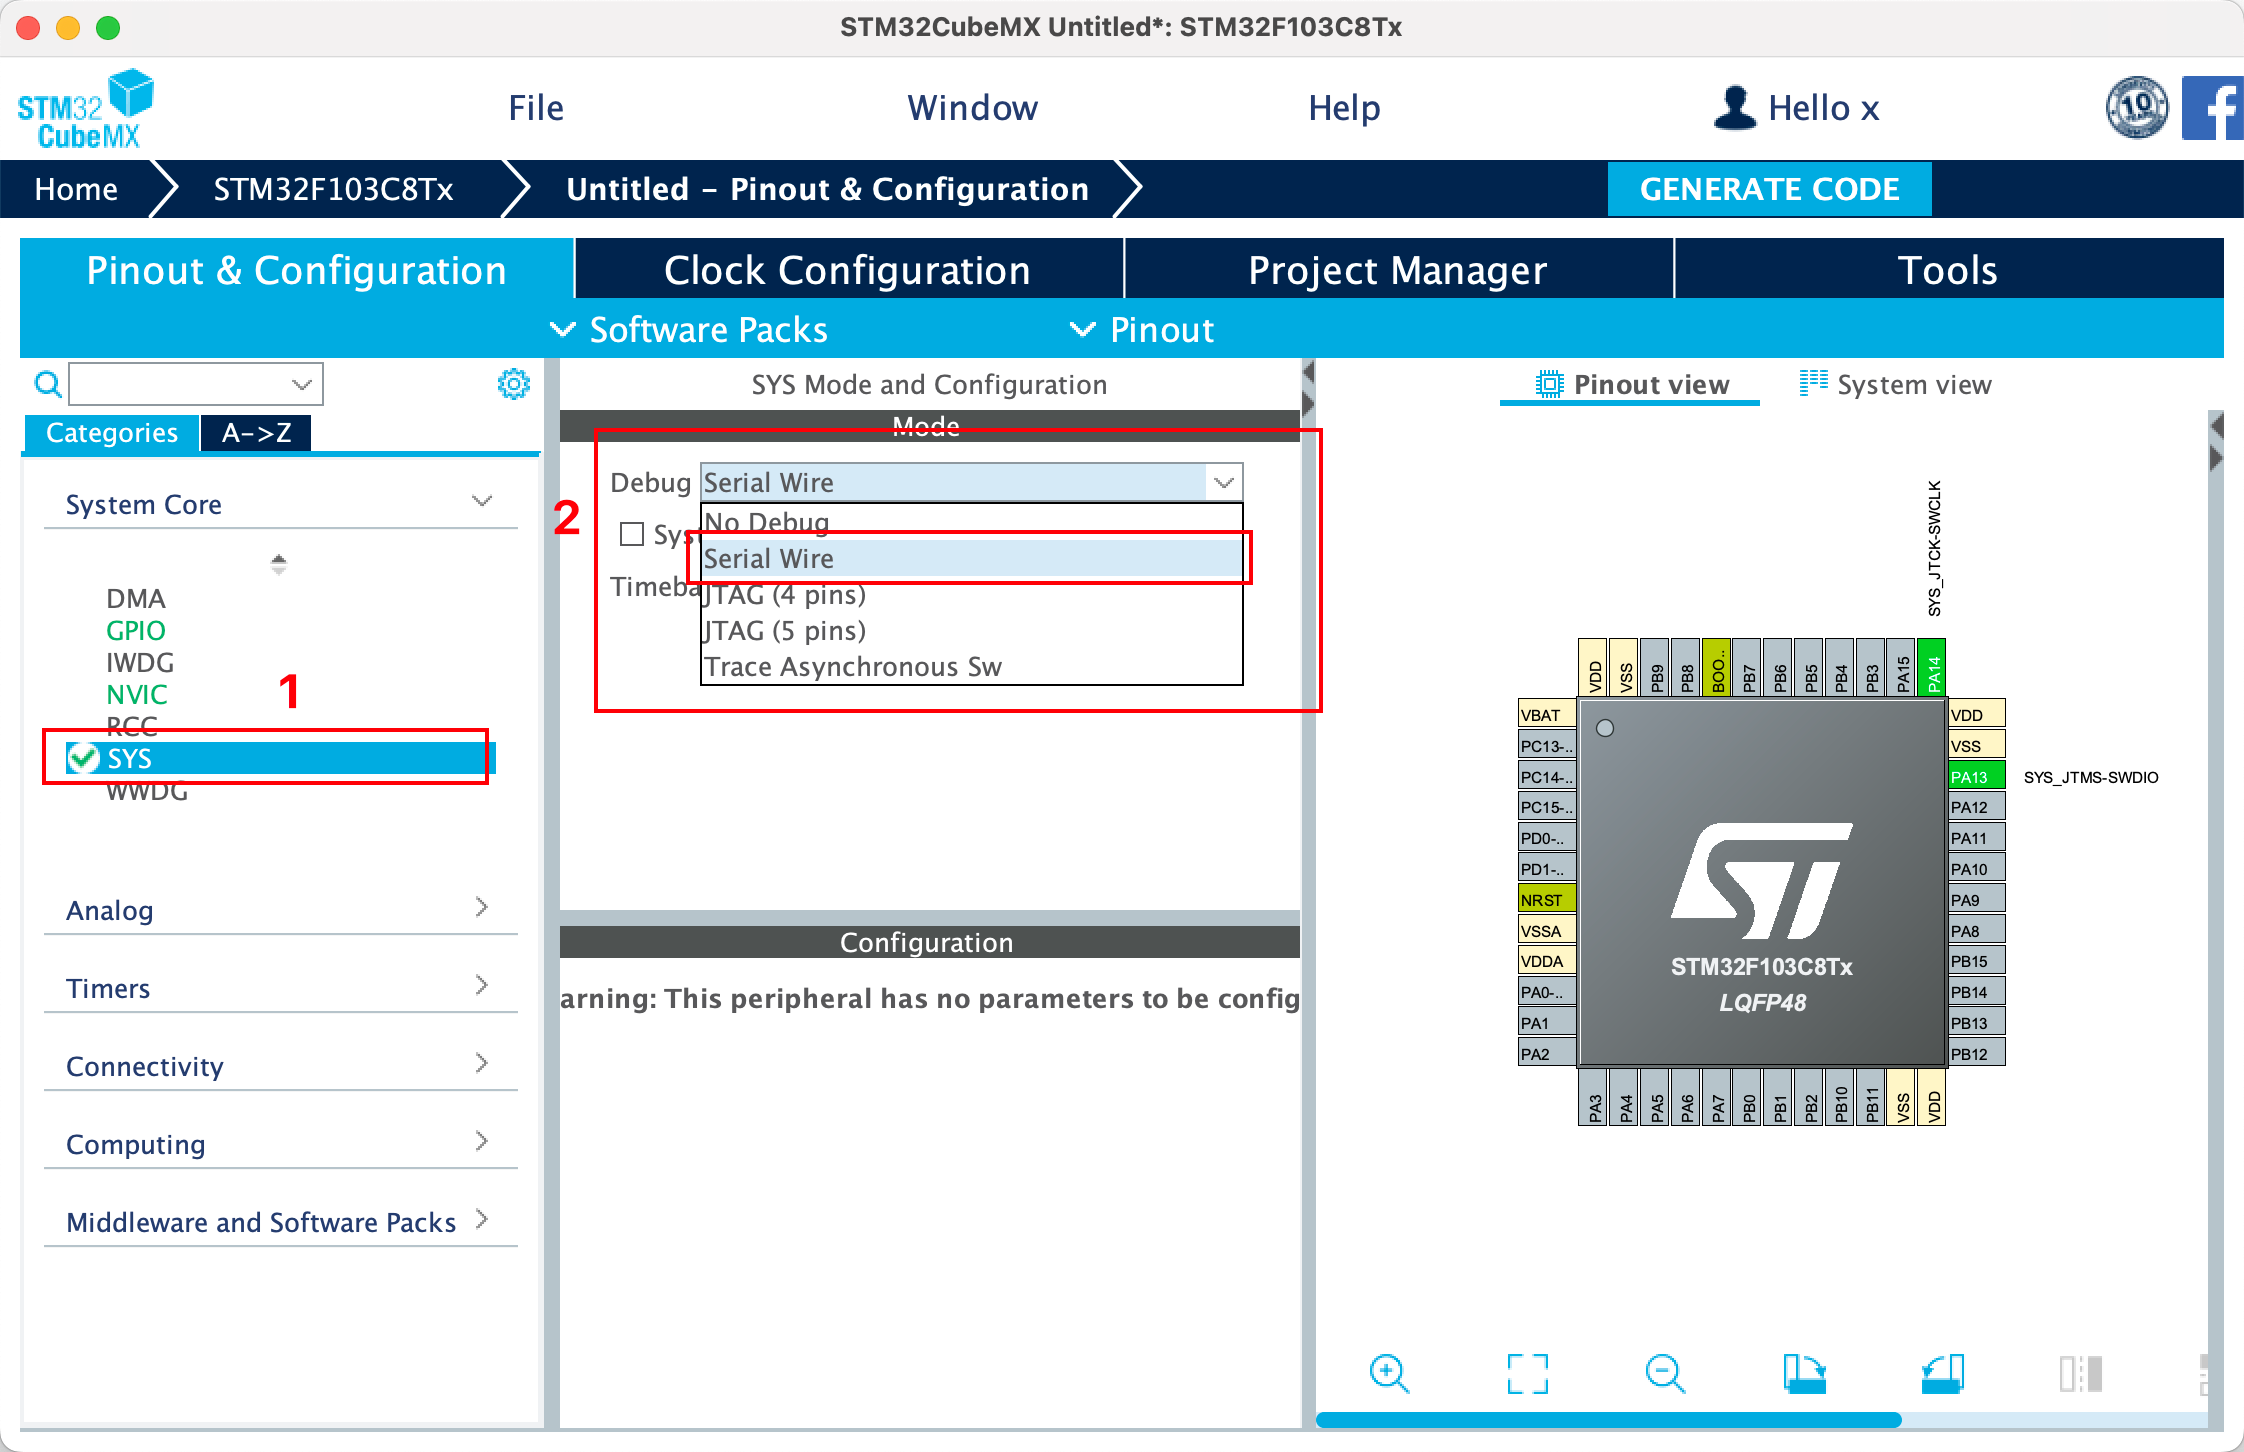
这步一定要选择 Serial Wire,否则程序在烧录的时候,会烧录失败:
Linux下使用 OpenOCD 烧录 STM32, 出现了 Error: init mode failed (unable to connect to the target) 错误.
如果在代码中, 不小心将 PA13,PA14 的 SWD 功能关闭, 例如使用了下面的代码
填写项目名称、路径等相关信息: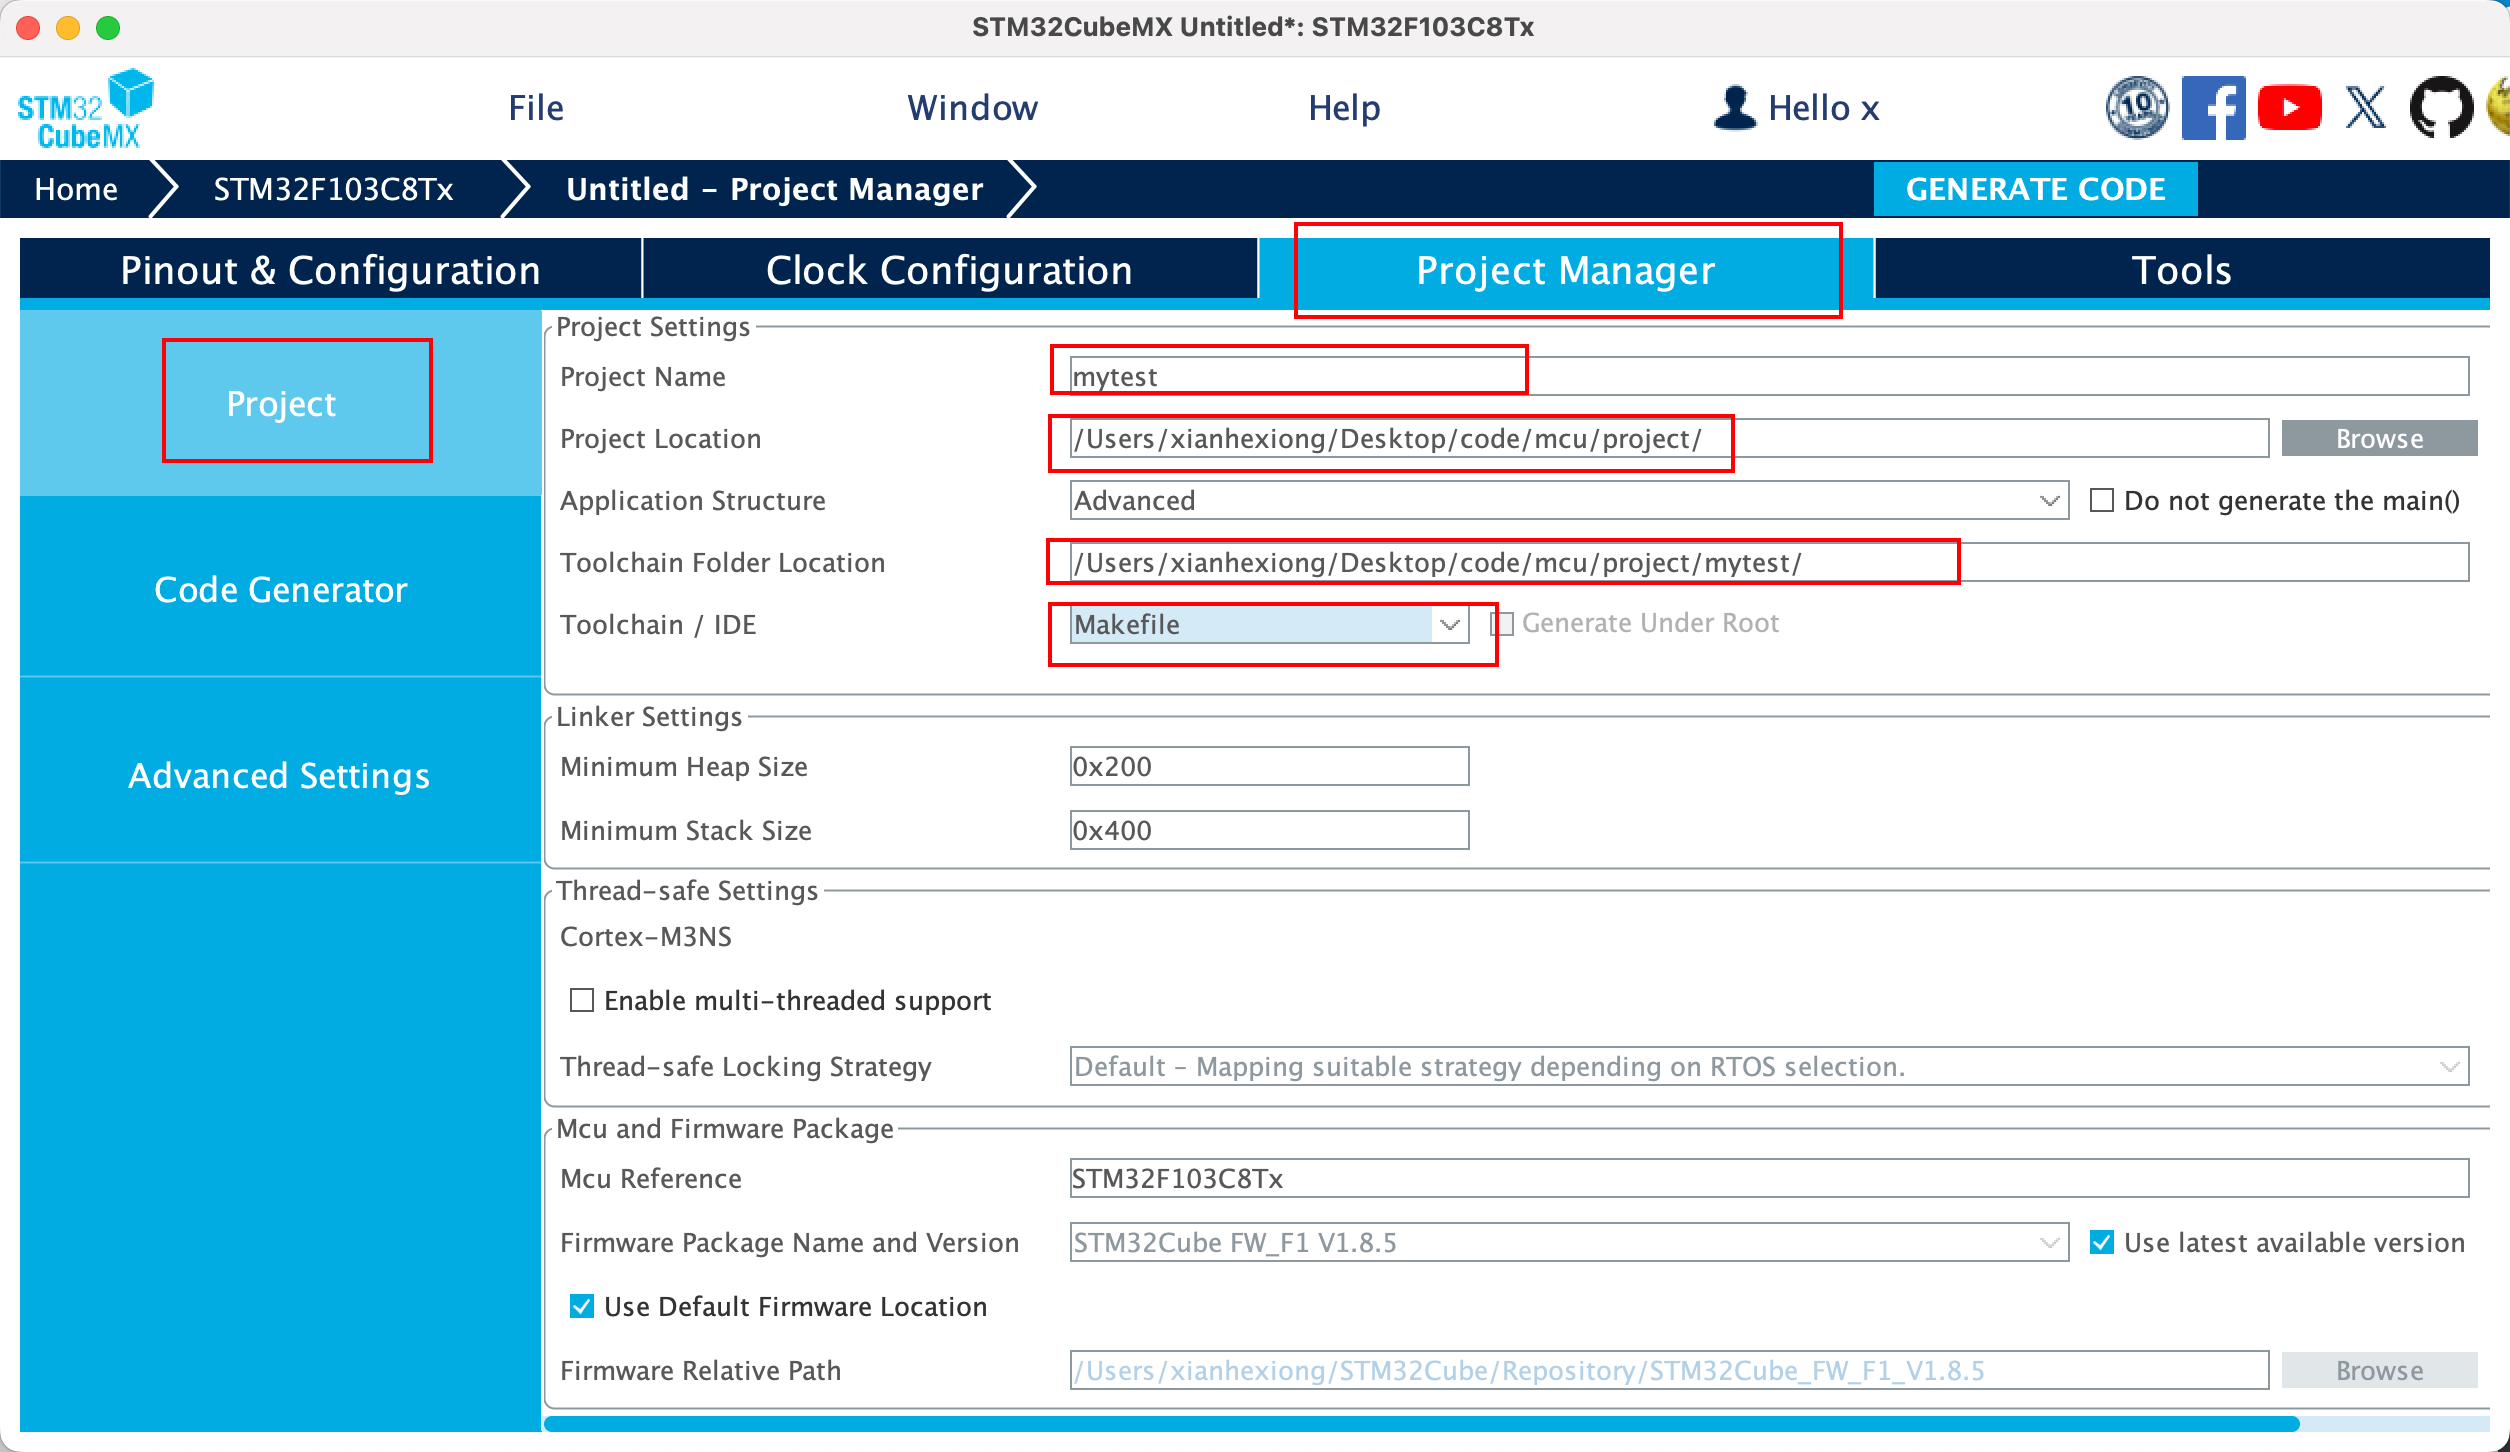
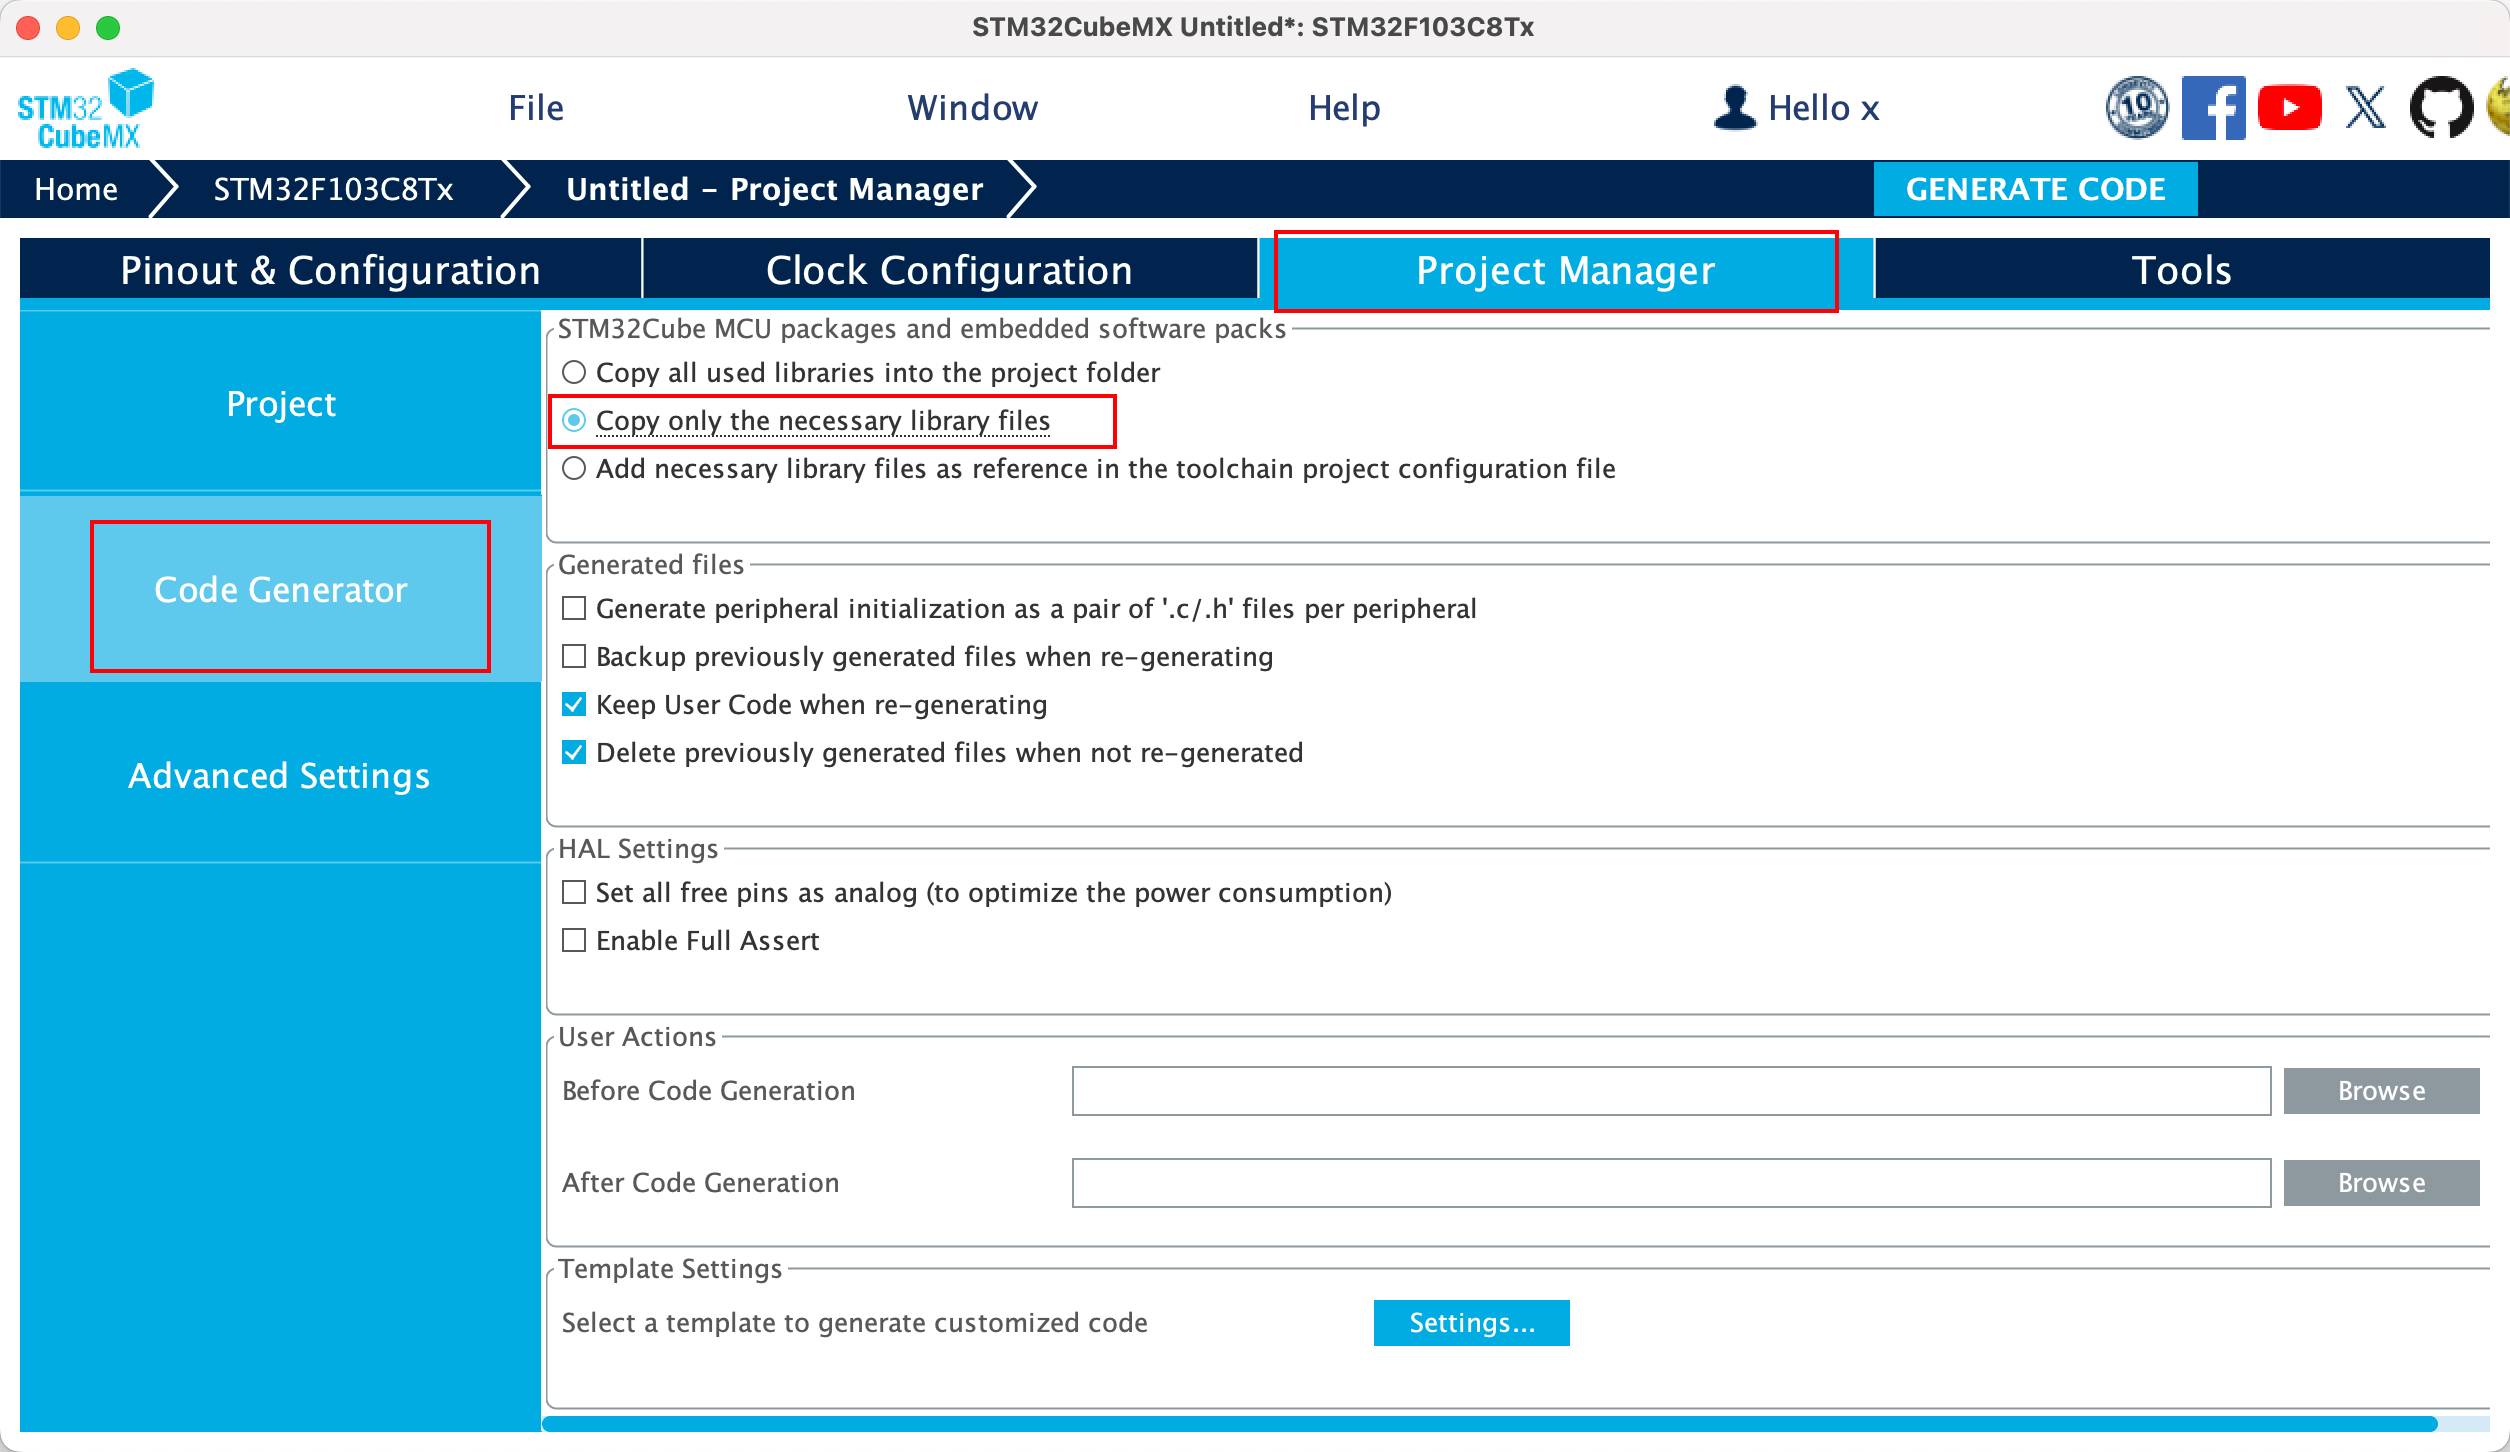
以上操作完成后,就可以生成代码了: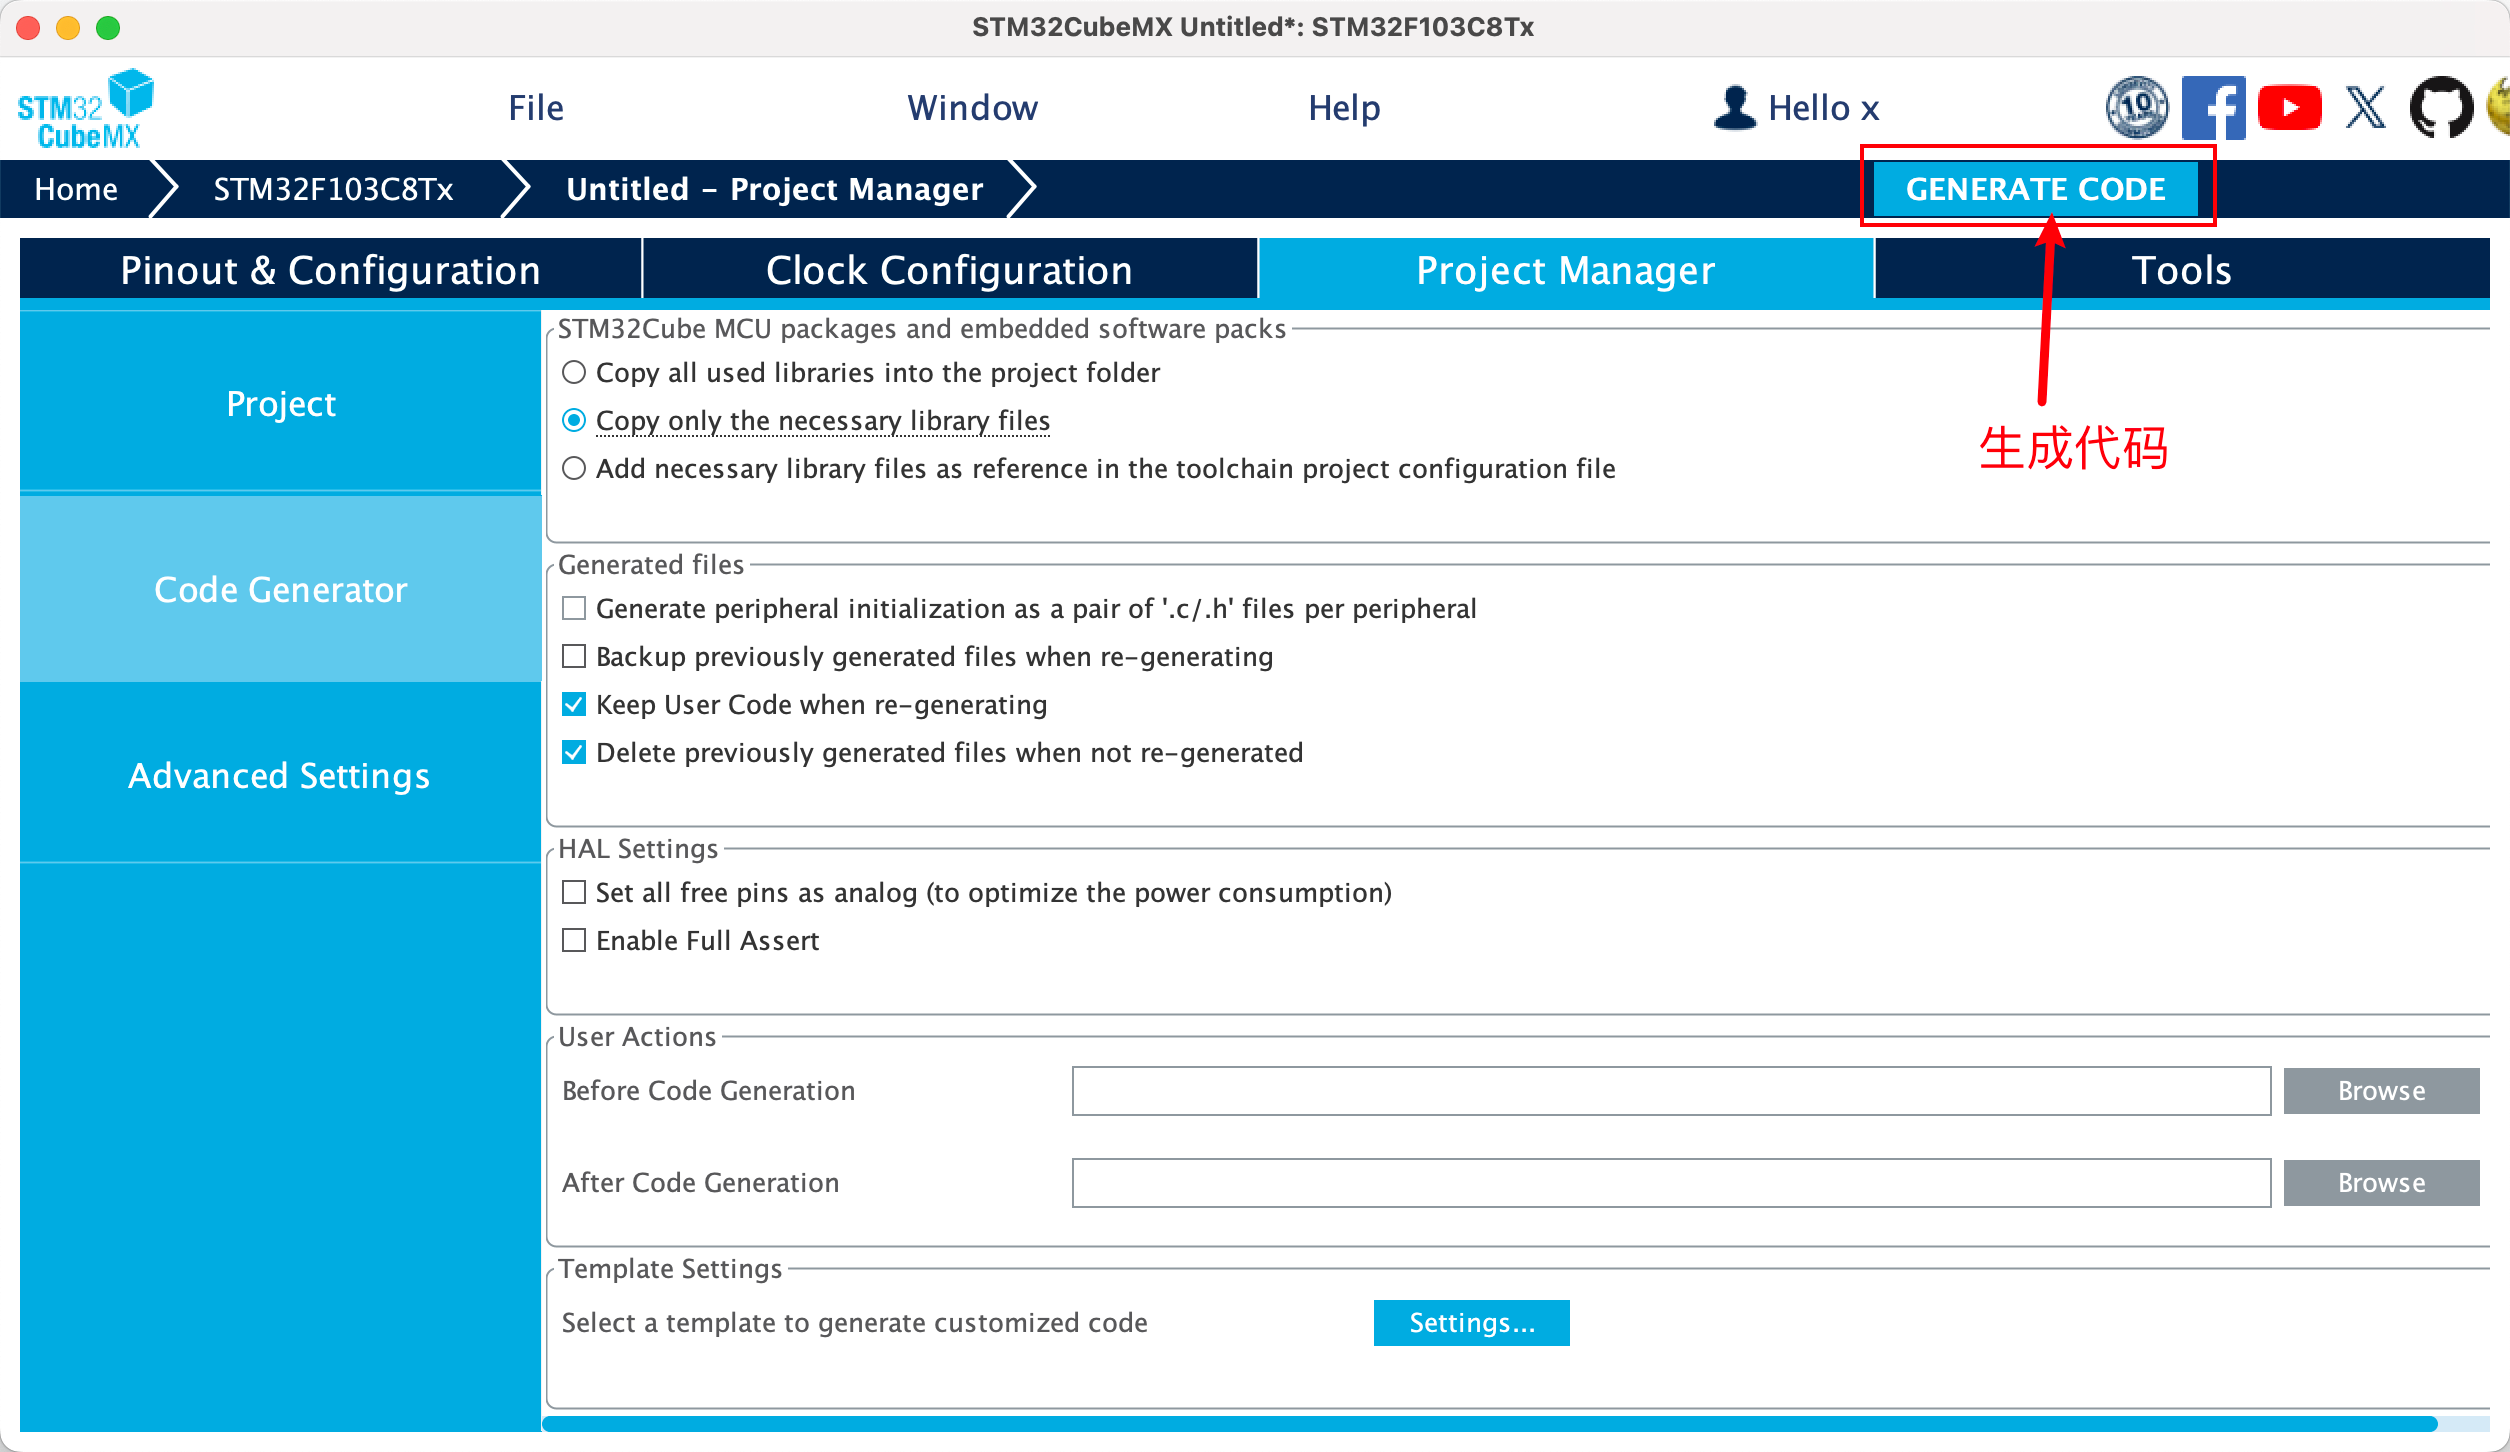
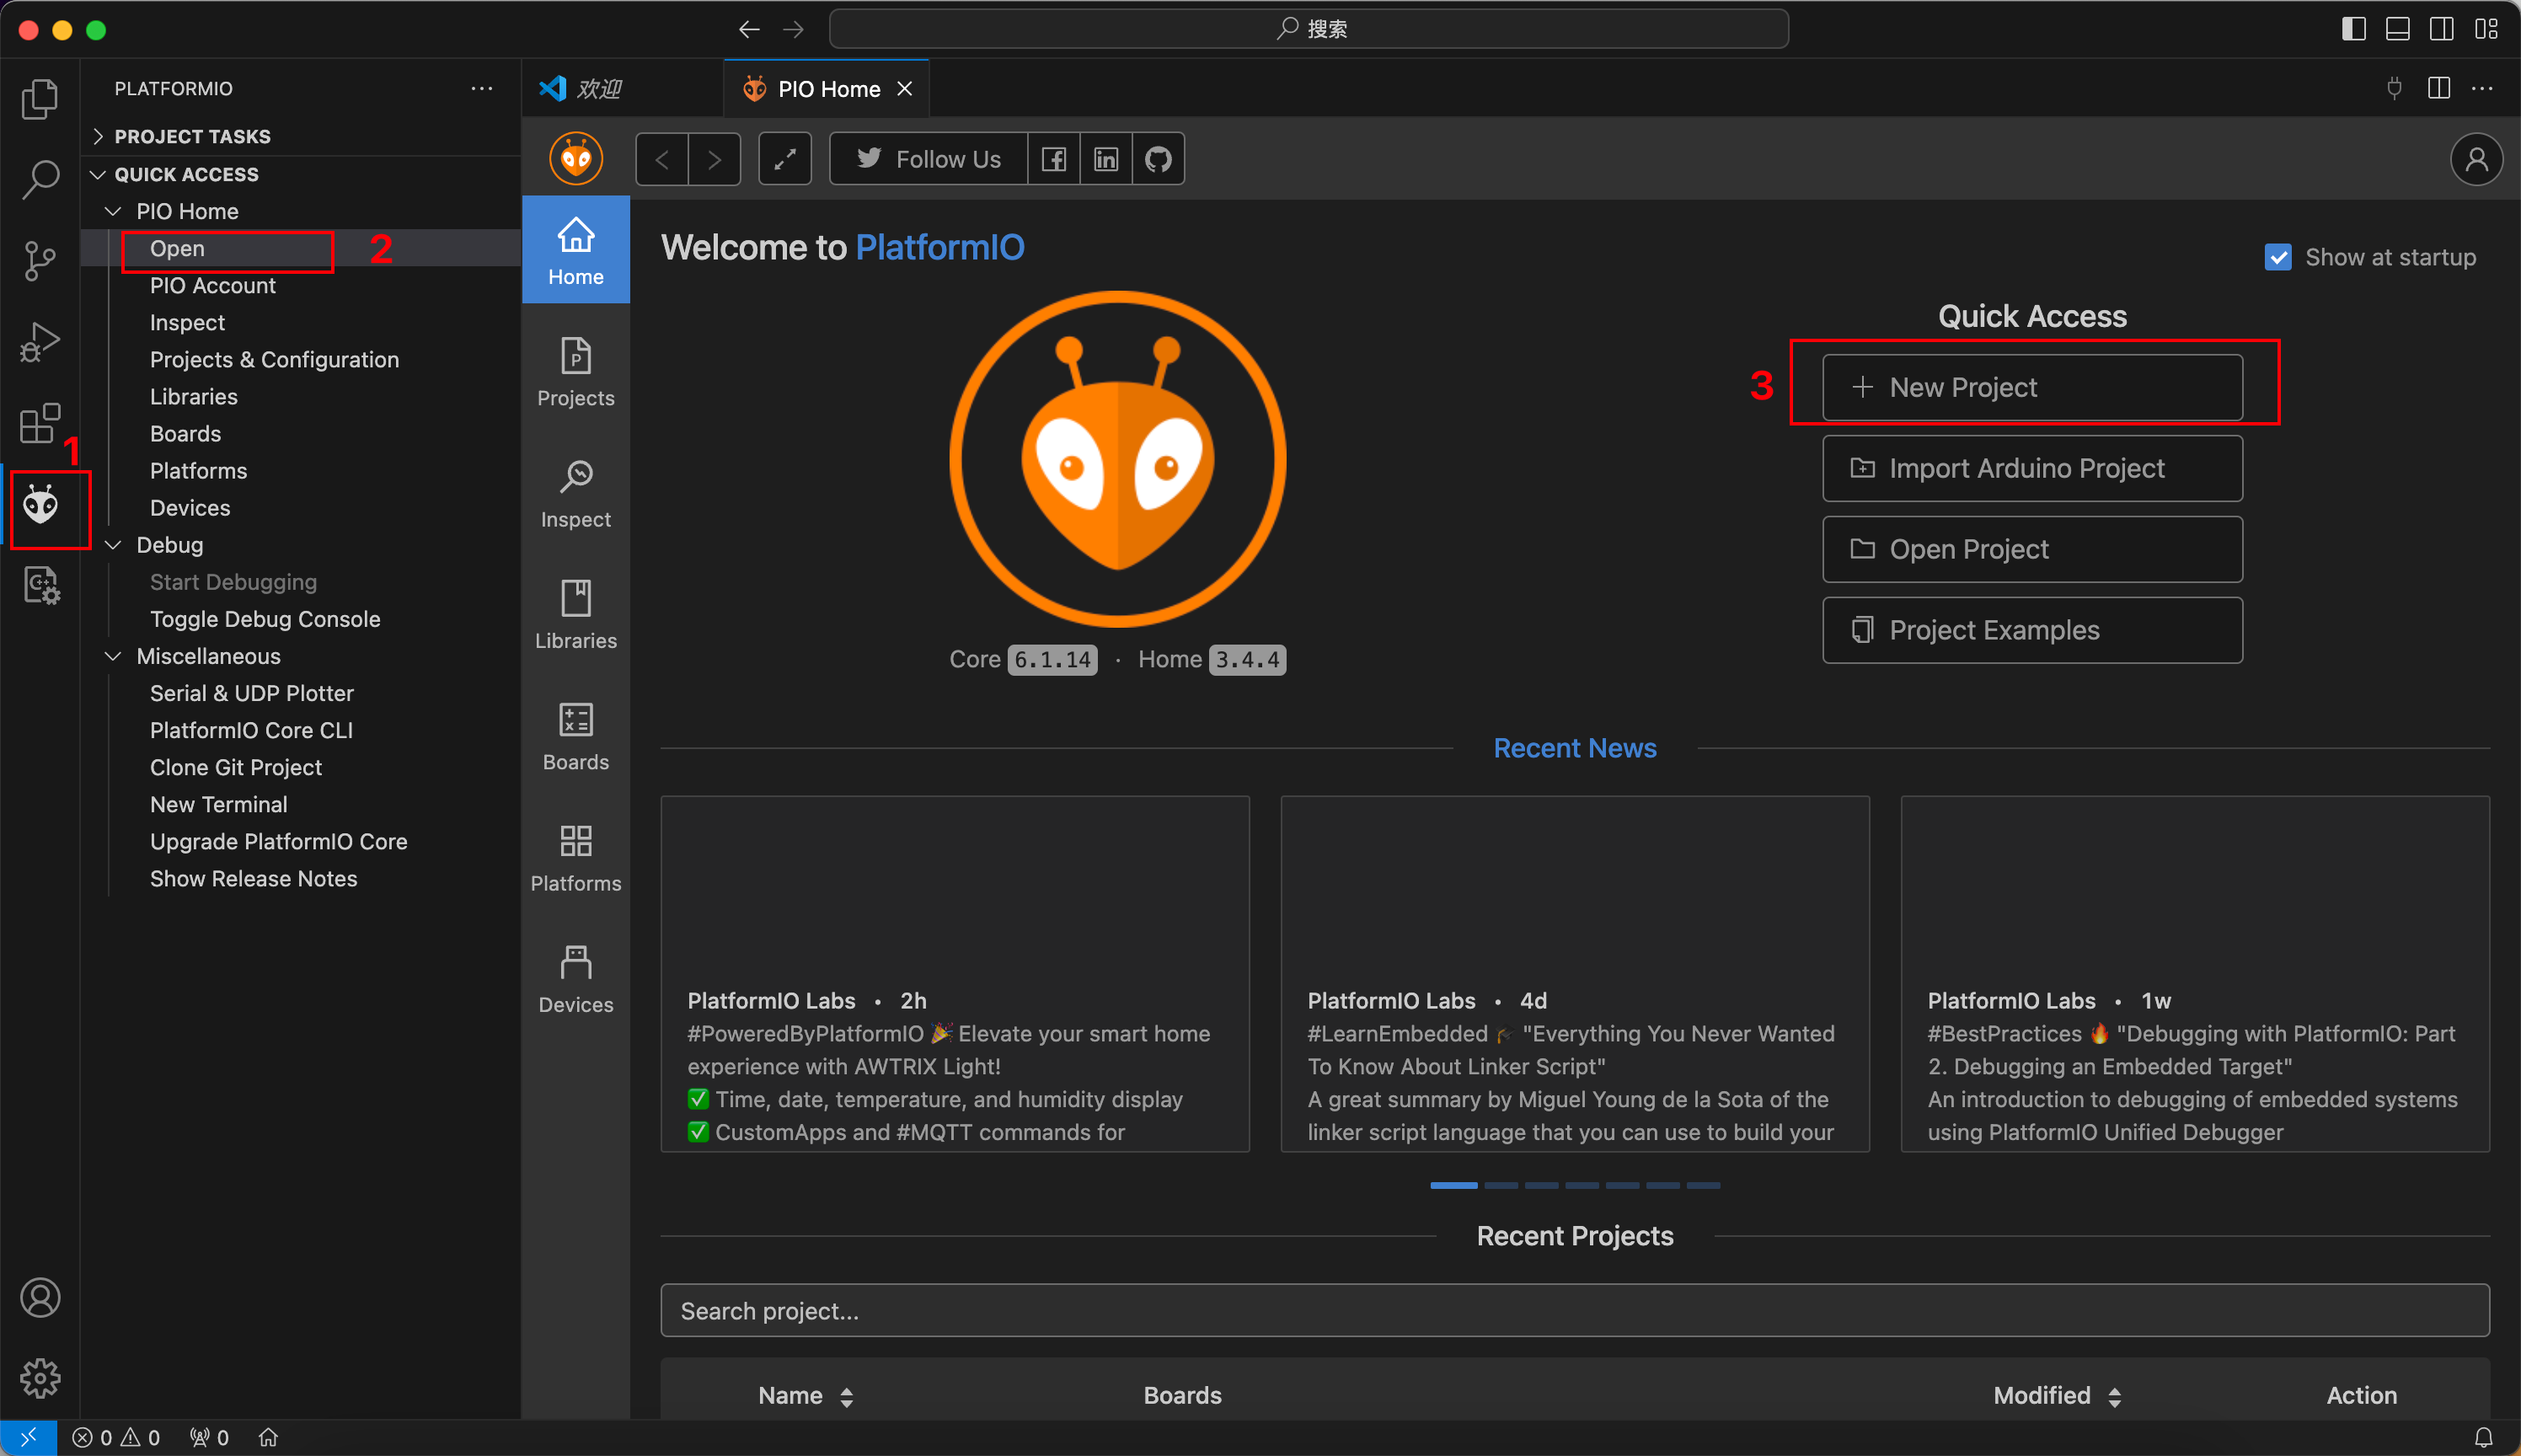
- vscode 配置
完成后,生成如下代码结构: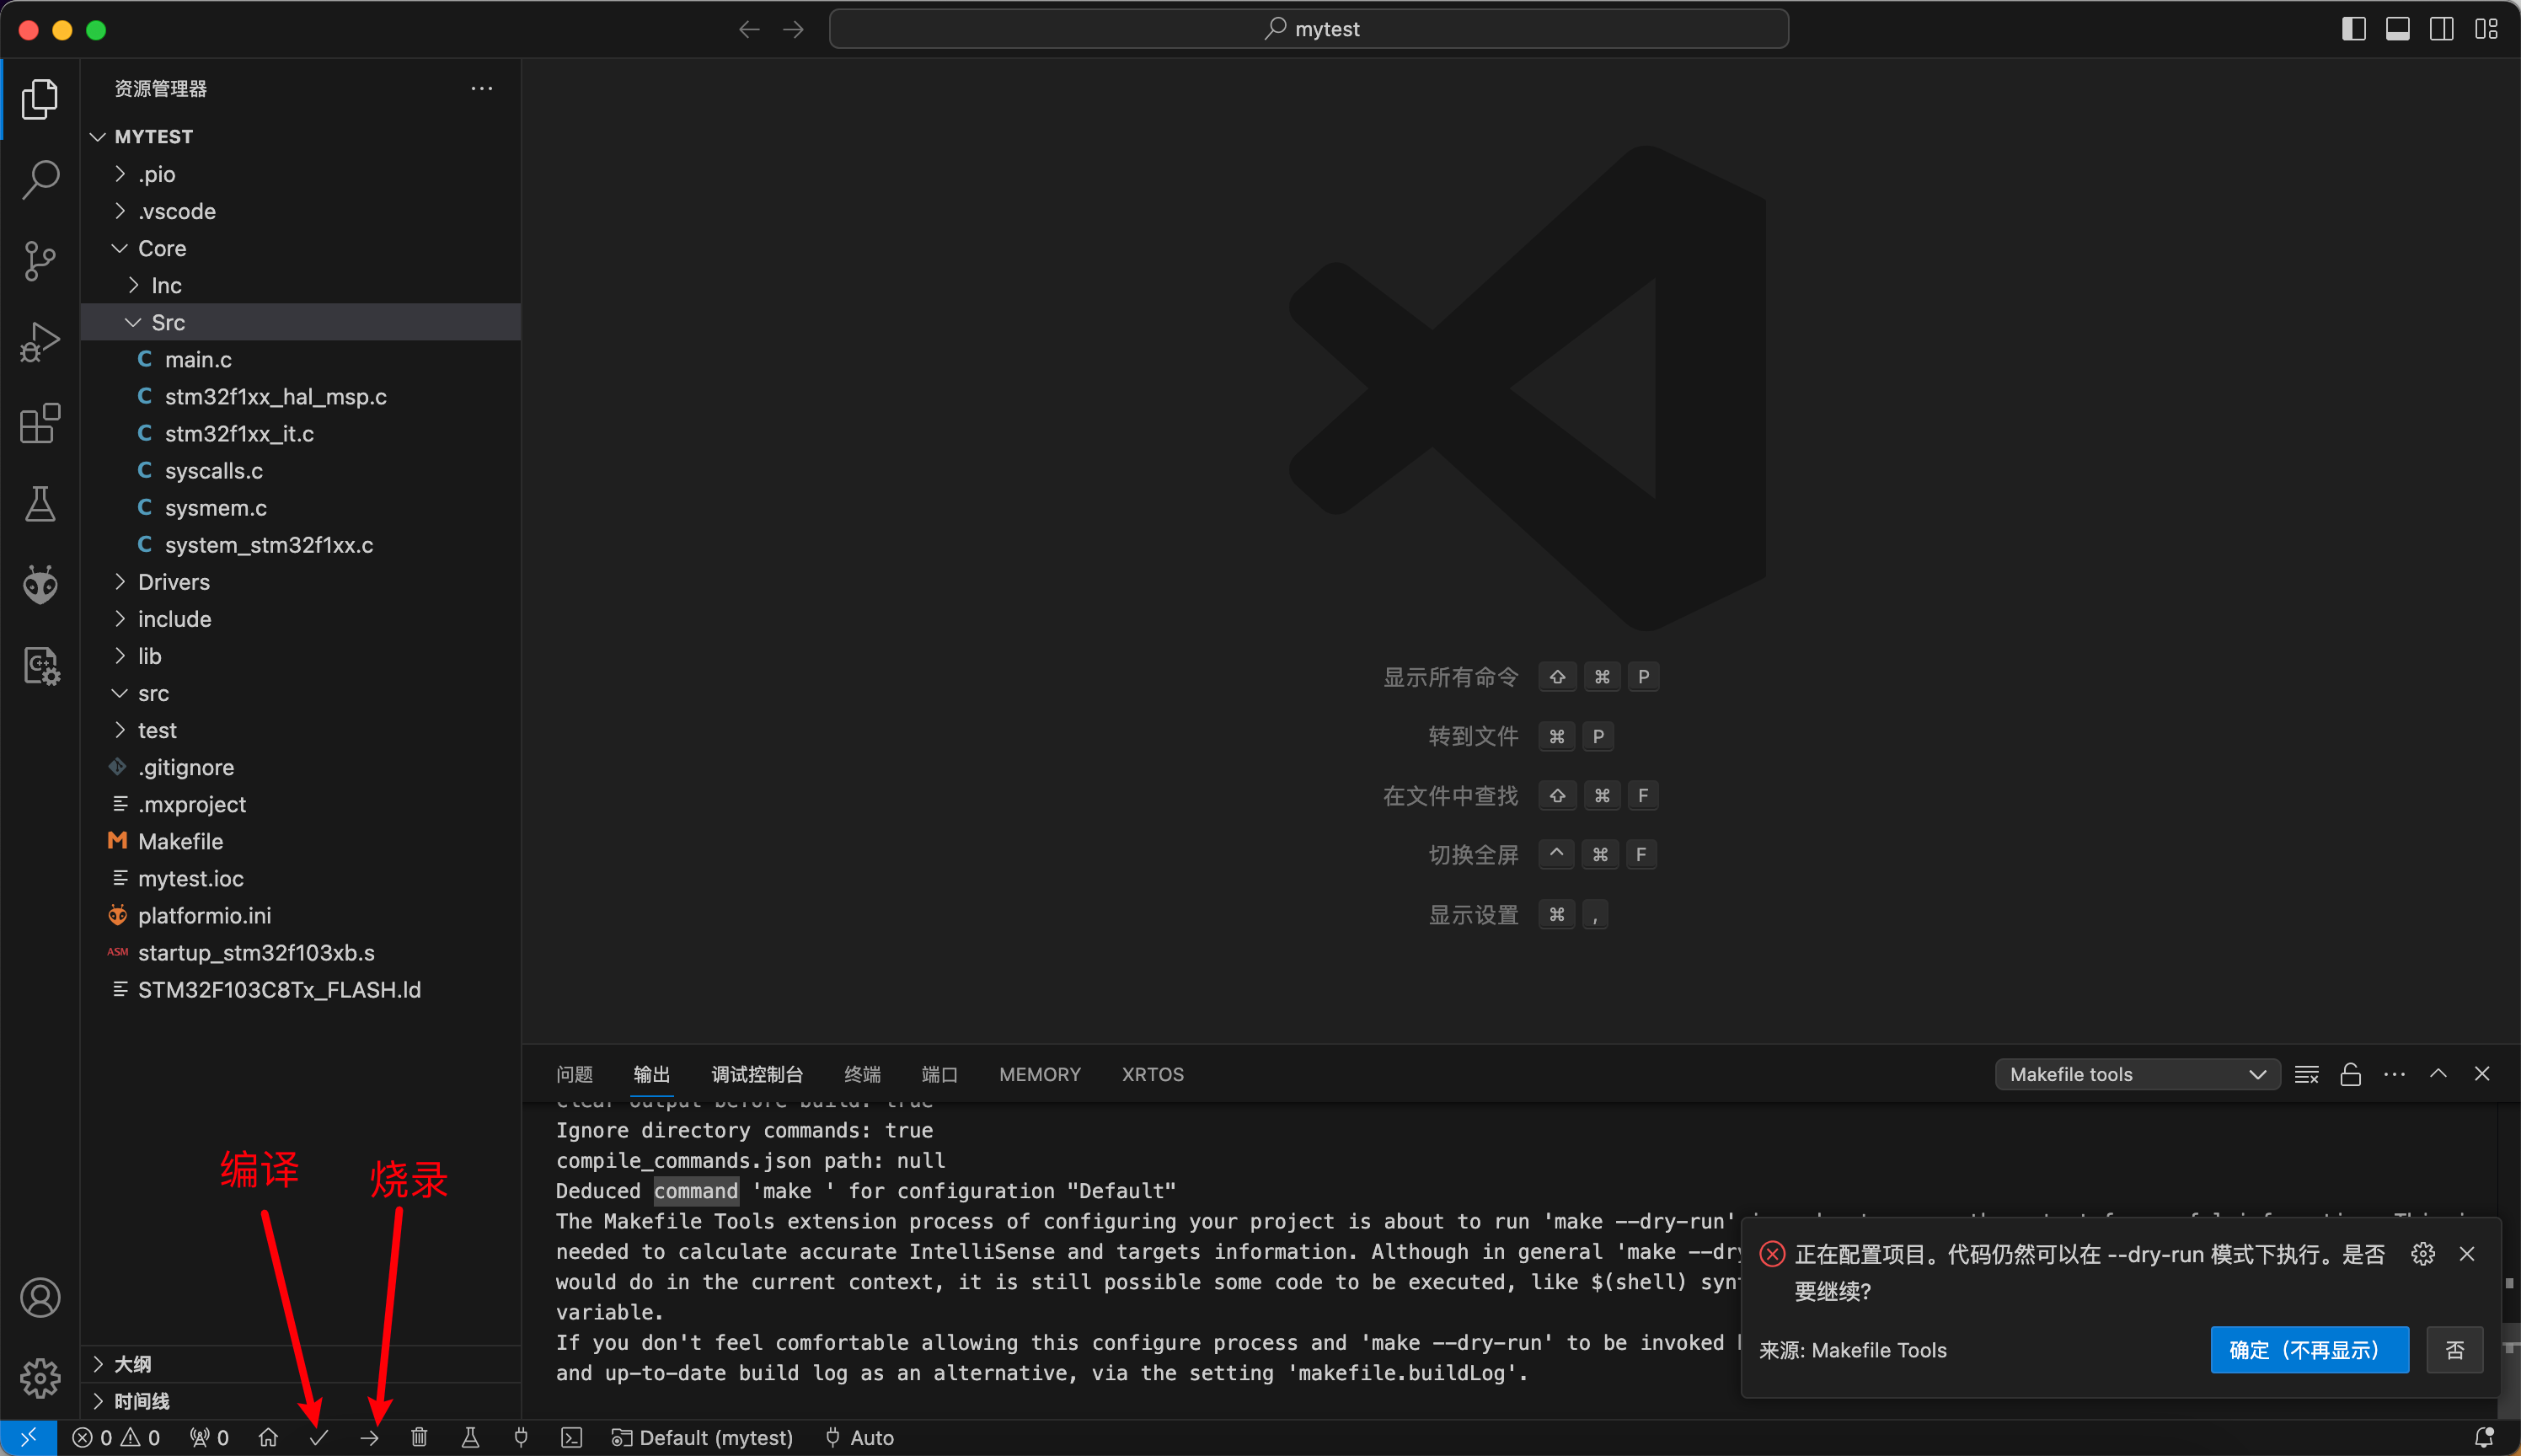
编译环境配置
首次编译的时候,会出现如下问题:
这是因为编译环境没配置好,未找到相关的主函数(main)等
打开根目录下的 platformio.ini 文件,增加以下配置:
; PlatformIO Project Configuration File
;
;   Build options: build flags, source filter
;   Upload options: custom upload port, speed and extra flags
;   Library options: dependencies, extra library storages
;   Advanced options: extra scripting
;
; Please visit documentation for the other options and examples
; https://docs.platformio.org/page/projectconf.html

[env:genericSTM32F103C8]
platform = ststm32
board = genericSTM32F103C8
framework = stm32cube

; 烧录协议 默认未 stlink 根据自己具体的烧录工具进行选择
; 参考:https://docs.platformio.org/en/latest/boards/ststm32/black_f407ve.html
upload_protocol = stlink

; 配置 源文件(src) 和 头文件(inc) 位置
[platformio]
src_dir = Core/Src
include_dir = Core/Inc
保存后再次编译就ok了。
烧录: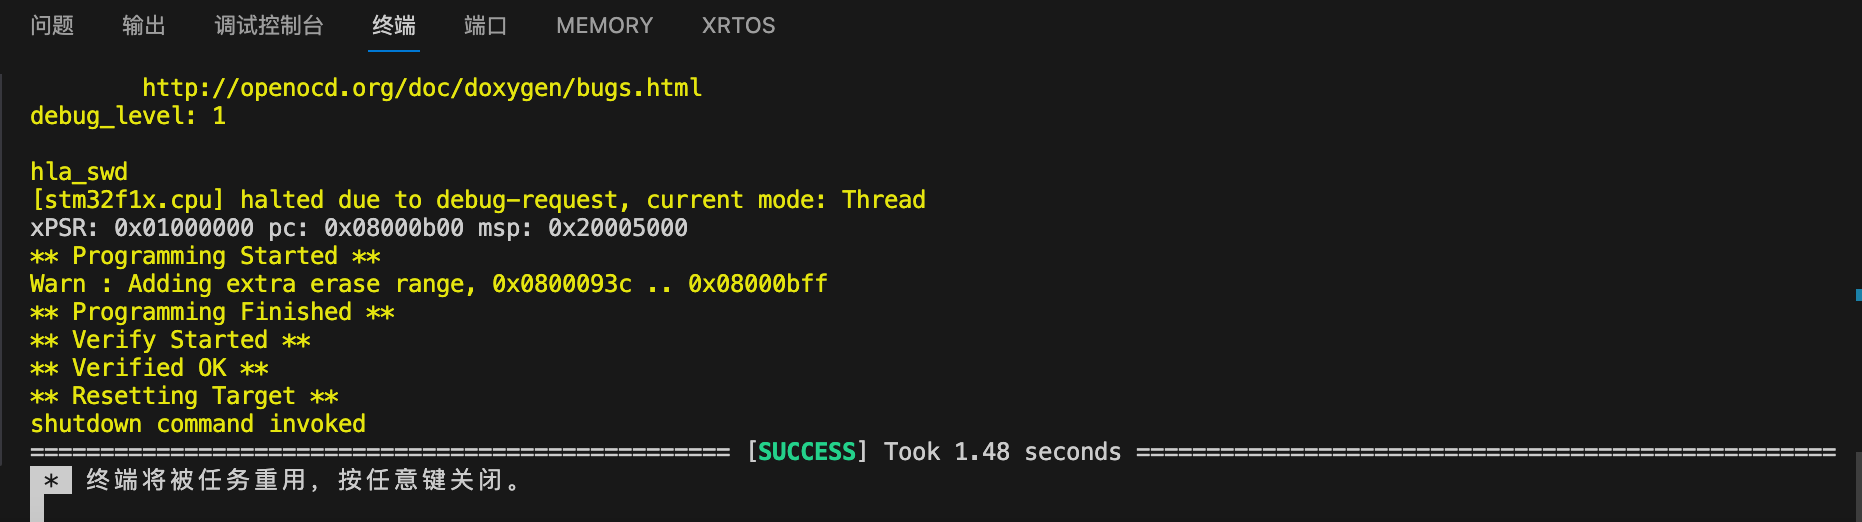
这样就说明烧写成功了,后面就可以进行开发学习了。
注:
在这个过程中,最后的烧录花了好长时间一直烧录失败,最后网上搜索,是由于在 STM32CubeMX 配置时 要选择 Serial Wire ,最后重建工程就ok了。
参考:
https://zhuanlan.zhihu.com/p/378739314
http://news.eeworld.com.cn/mcu/ic544541.html
https://docs.platformio.org/en/latest/boards/ststm32/black_f407ve.html
https://www.553668.com/manong/269440.html